How to Build a Pallet Shed DIY: Step-by-Step Guide for Beginners
How to Build a Pallet Shed DIY: A Comprehensive Step-by-Step Guide for Beginners
Constructing a pallet shed offers a cost-effective and environmentally friendly solution for additional storage space. This comprehensive guide provides a detailed, step-by-step approach for beginners, emphasizing safety and best practices throughout the construction process. While utilizing reclaimed pallets presents significant cost savings, careful planning and execution are crucial for a structurally sound and durable shed.
Phase 1: Planning and Preparation
Before commencing any construction, meticulous planning is paramount. This phase involves several key steps that lay the foundation for a successful project.
1.1 Site Selection and Assessment
Choose a level, stable location for your pallet shed, considering factors such as sun exposure, drainage, and proximity to utilities. Ensure the ground is adequately compacted to prevent settling and potential structural damage. Obtain any necessary permits from your local authorities before beginning construction. Consider the size of the shed in relation to your available space and intended use.
1.2 Material Acquisition and Assessment
Sourcing appropriate pallets is crucial. Prioritize heat-treated pallets (HT) over methyl bromide-treated (MB) pallets, as MB pallets may contain harmful chemicals. Inspect each pallet carefully for rot, damage, or loose nails. You will need a significant number of pallets depending on the desired dimensions of your shed. Supplement the pallets with additional lumber for structural support and roofing, as pallets alone may not provide sufficient strength for the entire structure. Acquire all necessary fasteners, such as screws, nails, and wire, as well as any additional materials like roofing felt, sealant, and paint (optional).
1.3 Tool Acquisition and Safety Precautions
Assemble the necessary tools before starting construction. This will streamline the process and ensure you have everything you need readily available. Essential tools include:
- Measuring tape and level
- Hammer or nail gun
- Screwdriver (both Phillips and flathead)
- Drill with various drill bits
- Circular saw or hand saw
- Safety glasses
- Work gloves
- Pry bar
- Shovel (for ground preparation)
Remember to prioritize safety throughout the project. Always wear appropriate safety gear, including safety glasses and work gloves. Ensure the work area is well-lit and clear of obstructions. When using power tools, follow all manufacturer's instructions and safety guidelines.
Phase 2: Foundation and Frame Construction
This phase focuses on creating a robust and level foundation for your pallet shed and building the main frame structure.
2.1 Foundation Preparation
Prepare a level base for your shed. This can be achieved by compacting the soil, laying down gravel, or creating a concrete slab, depending on your budget and the intended use of the shed. A level foundation is critical for preventing uneven settling and structural problems down the line. Consider using landscape fabric to prevent weed growth underneath the shed.
2.2 Frame Assembly
Begin by creating the base frame of the shed using sturdy pallets or additional lumber. Ensure the frame is square and level, using your level and measuring tape to check measurements frequently. Securely fasten the frame components together using screws or nails. For increased stability, consider adding corner braces to reinforce the frame. The frame should be large enough to accommodate your desired shed dimensions, taking into account the thickness of the pallet walls and roofing material.
2.3 Wall Construction
Construct the walls of the shed by attaching pallets vertically to the frame. Ensure that the pallets are tightly fitted together and secured to the frame using screws or nails. For added strength, consider using additional lumber to create vertical supports between the pallets. Inspect each pallet for stability before securing it to the frame. If necessary, reinforce weak pallets with additional bracing. You might need to cut some pallets to fit perfectly. Plan your pallet placement carefully to minimize gaps and ensure a consistent appearance.
Phase 3: Roofing and Finishing
This phase completes the shed structure and addresses the exterior and interior finishing.
3.1 Roofing Installation
Construct the roof frame using lumber, ensuring sufficient pitch to facilitate water runoff. Attach the roof frame to the top of the shed's walls. Cover the roof frame with plywood or other suitable roofing material. Apply roofing felt or shingles to ensure water resistance. Consider the local climate and potential for heavy snowfall or rainfall when selecting your roofing material.
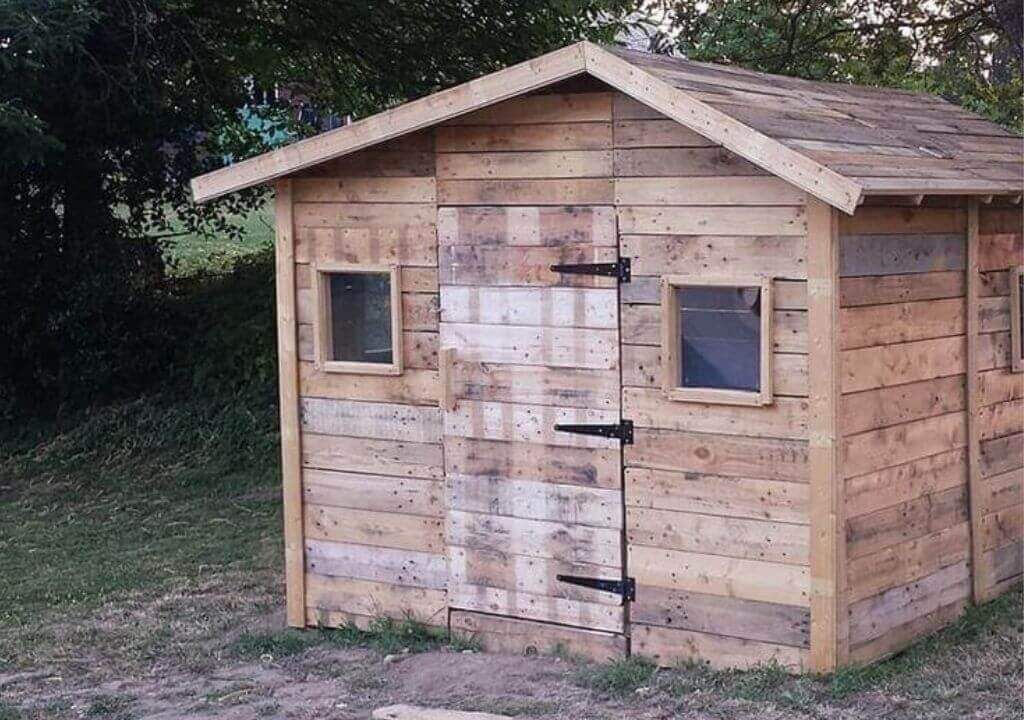
3.2 Door and Window Installation (Optional)
If desired, install a door and/or windows. This will require careful planning and cutting of pallets or additional lumber. Ensure the door and windows are properly sealed to prevent drafts and water ingress. You can purchase pre-made doors and windows or construct your own using additional lumber and hinges.
3.3 Exterior and Interior Finishing
Once the main structure is complete, consider adding finishing touches. This may include applying sealant to protect the wood from the elements, painting the shed for aesthetic appeal and added protection, and adding shelving or other interior features. Consider using weather-resistant paint designed for exterior use.
Phase 4: Final Inspection and Maintenance
Before declaring your project complete, conduct a thorough inspection. Ensure all components are securely fastened, there are no gaps or cracks that could compromise weather resistance, and the structure is stable and level.
4.1 Structural Integrity Check
Carefully inspect the entire structure for any weaknesses or potential structural issues. Pay attention to the connections between pallets, the roof structure, and the overall stability of the shed. Address any issues immediately before proceeding.
4.2 Weatherproofing and Sealing
Apply a weatherproof sealant to all joints and gaps to prevent water damage and improve the longevity of the shed. This step is crucial to ensure the shed remains durable throughout various weather conditions.
4.3 Ongoing Maintenance
Regular maintenance is essential for preserving the lifespan of your pallet shed. Periodically inspect for any signs of damage, such as rot, loose connections, or pest infestation. Apply a fresh coat of paint or sealant as needed to protect the wood from the elements.
Building a pallet shed is a rewarding DIY project that can provide valuable extra storage space. By carefully following these steps and prioritizing safety throughout the process, you can create a durable and functional shed that will serve you well for years to come.


Comments
Post a Comment