How to Build a Pallet Shed for Free Using Simple Plans and Materials
Constructing a Cost-Effective Pallet Shed: A Comprehensive Guide
The allure of a free structure is undeniable, particularly when considering the potential for added storage space. This guide details the meticulous process of constructing a functional and durable shed using reclaimed pallets, minimizing material costs to essentially zero. While free materials necessitate extra effort in sourcing and preparation, the rewards of a self-built, cost-effective shed are substantial.
Phase 1: Procurement and Assessment of Pallet Materials
The foundation of this project rests on the acquisition of suitable pallets. Sourcing free pallets requires diligence and strategic networking. Several avenues should be explored:
Identifying Potential Sources
Begin by contacting local businesses. Supermarkets, hardware stores, and shipping companies often dispose of used pallets. Explain your project and emphasize your commitment to responsible reuse. Many establishments will gladly provide pallets free of charge, rather than incurring disposal fees.
Evaluating Pallet Suitability
Not all pallets are created equal. Careful inspection is crucial to ensure structural integrity. Prioritize pallets constructed from sturdy, pressure-treated lumber. Avoid pallets showing significant signs of damage, such as:
Phase 2: Preparing the Pallet Materials
Once suitable pallets are acquired, thorough preparation is paramount. This stage involves cleaning, dismantling, and preparing the individual planks for construction.
Cleaning and Disassembly
Begin by meticulously cleaning each pallet. Use a wire brush, scraper, and pressure washer to remove dirt, debris, and any remaining staples or nails. Dispose of all waste materials responsibly.
Disassembling the Pallets
Carefully dismantle the pallets, separating the planks and structural members. This requires caution to avoid injury. Use a crowbar or pry bar to loosen the nails and carefully remove the boards. Always wear appropriate safety gear, including gloves and eye protection.
Plank Assessment and Preparation
Inspect each plank for damage. Any severely damaged or warped planks should be discarded. Straighten any slightly warped planks using clamps and weights. Cut or trim planks to the required lengths using appropriate hand or power tools. Ensure all cuts are clean and precise.
Phase 3: Shed Construction
The construction phase requires a well-defined plan. A simple shed design is recommended for beginners. This could involve a basic rectangular structure with a gable roof.
Foundation and Base
A level and stable foundation is essential for the longevity of your shed. A simple gravel base or a concrete slab is recommended. Ensure the base is adequately sized to accommodate the dimensions of your planned shed.
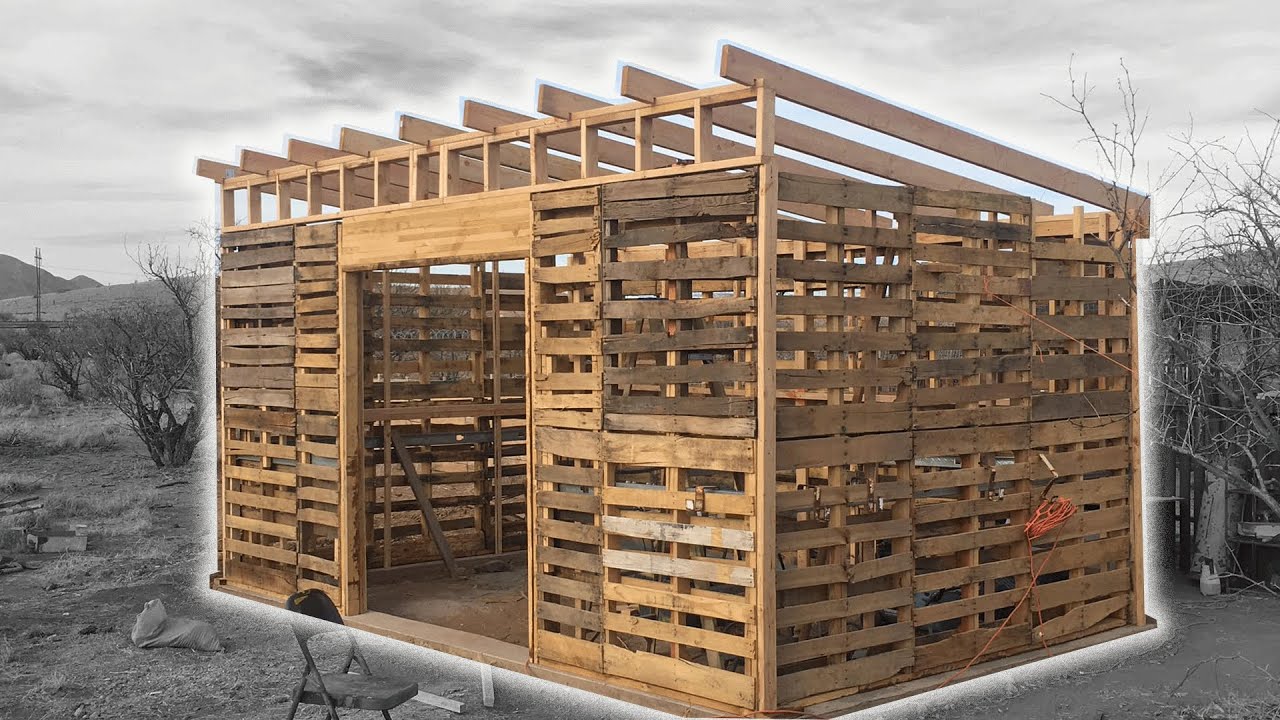
Framing the Walls
Utilize the prepared planks to construct the walls. You can create a simple frame structure using the stronger pallet planks, then fill in the gaps with additional planks. Ensure the frames are square and plumb using a level and measuring tape.
Roof Construction
Construct a gable roof using prepared planks. You can construct simple trusses or use a more straightforward approach using overlapping planks. The roof should have sufficient overhang to protect the walls from rain.
Cladding and Finishing
Once the basic structure is complete, clad the walls and roof with remaining prepared planks. Ensure adequate overlap to ensure weather resistance. You can further improve weather protection by using a sealant or waterproof paint.
Door and Window Installation (Optional)
If desired, incorporate a door and windows into the design. This will require more careful planning and execution. Consider using salvaged materials or inexpensive alternatives.
Phase 4: Final Touches and Considerations
After the main construction, several final steps enhance the shed's functionality and longevity.
Securing the Structure
Reinforce the structure using screws, bolts, or nails, ensuring all joints are secure. Consider adding bracing to increase stability and withstand potential wind or weather stress.
Weatherproofing
Applying a weather-resistant sealant or paint protects the wood from moisture damage and enhances the shed's longevity. This is particularly important for untreated pallets.
Finishing Touches
Consider adding features like shelves, hooks, or a work surface to maximize the shed's utility. This will depend on your intended use for the shed.
Safety Precautions
Throughout the entire process, prioritizing safety is paramount. This includes but is not limited to:
Building a pallet shed is a rewarding project that combines resourcefulness, creativity, and practical skills. While the initial stages require effort, the final result provides a functional and cost-effective solution for additional storage. Remember meticulous planning, careful execution, and adherence to safety procedures are crucial for success.


Comments
Post a Comment